

Facebook Ads
The Facebook Ads Collector enables you to monitor Facebook campaigns, including spend/cost monitoring, improving campaign efficiency, and competitive analysis.
Creating a Facebook Ads data source
- In the Navigation Panel, go to Integrations > Catalog.
- Use the Search box OR click the Business Packages filter to locate the data source.
- Hover over the Facebook Ads tile, and click Start.
*Note: If the data source has already been used, a dialog is displayed in which you can select from one of the listed sources. Alternatively, create a new source by clicking Add a new source. - In the displayed dialog, follow the onscreen instructions (for example, you will be prompted to login to the relevant Facebook account).
Creating a Facebook Ads stream query
If you have just created a Facebook Ads data source, skip to step 3.
-
In the Sources page (accessed by clicking Integrations > Sources in the Navigation Panel), filter the list of streams to find the Facebook Ads source for which you want to create a stream query.
*Note: The streams associated with that source are displayed. If the streams panel is empty, no stream queries exist for that source. -
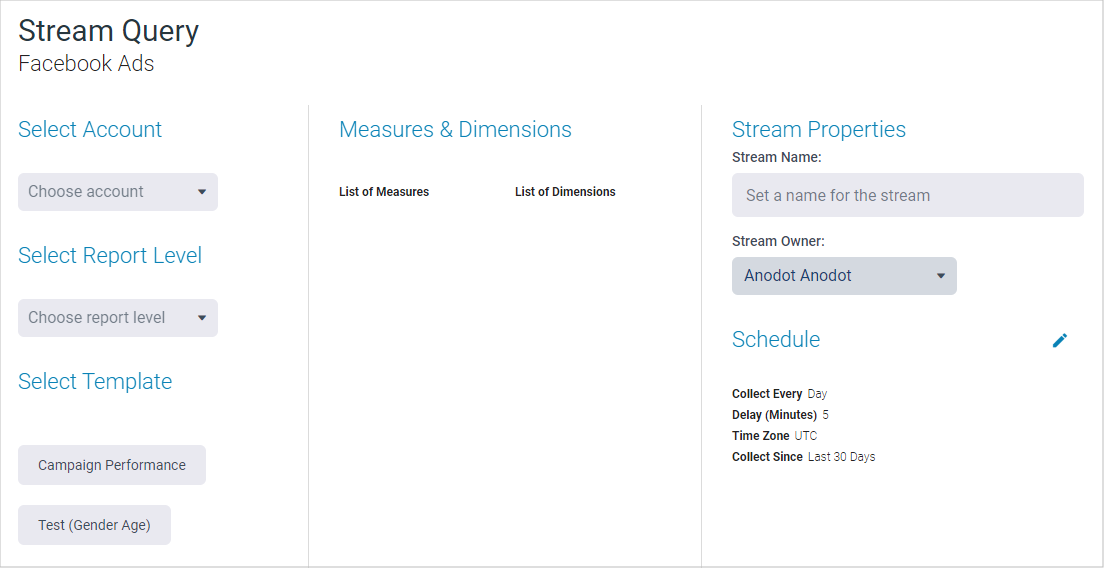
Hover over the Facebook Ads data source, and click + New Stream. The Stream Query page is displayed.
-
Define your stream query settings in the following sections:
- Select Account: Choose the relevant account from the dropdown list.
- Select Report Level: Choose the report level from one of Account, Ad, Adset, or Campaign.
- Select Template: Select from the available templates.
- Stream Properties: Define a name and owner for the stream.
- Schedule: Click the pencil icon to define the Collect Since value (the time span of data to query while initializing a stream).
-
Review the Stream Query page to confirm your chosen stream data.
-
Click NEXT. The Stream Table is displayed; see Stream Tables for more information
Updated over 1 year ago