

Snowflake
Creating a Snowflake database source
- In the Navigation Panel, go to Integrations > Catalog.
- Use the Search box OR click the Databases filter to locate the data source.
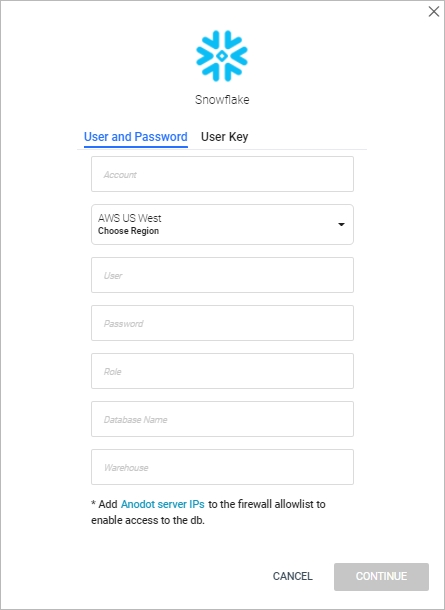
- Hover over the Snowflake tile, and click Start. The Snowflake dialog is displayed, as shown below.
Note: If the data source has already been used, a dialog is displayed in which you can select from one of the listed sources. Alternatively, create a new source by clicking Add a new source. - Click the User and Password tab (to enter user credentials), OR click the User Key tab (to enter key authentication details).
- In the User and Password tab, define the following:
- Enter the Account locator. See instructions to get the account locator here
- Choose the relevant Region.
- Please note the following fields are case sensitive:
-
Enter the User Name.
-
Enter the Password.
-
Enter the User Role.
-
Enter a Database Name.
-
Enter a Warehouse.
-
- In the User Key tab, define the following:
- Enter the Account locator. See instructions to get the account locator here
- Choose the relevant Region.
- Please note the following fields are case sensitive:
-
Enter the User Name.
-
Enter the Key parameters. See the Snowflake documentation for further details about key authentication.
-
Enter the Key Password (optional).
-
Enter the User Role.
-
Enter a Database Name.
-
Enter a Warehouse.
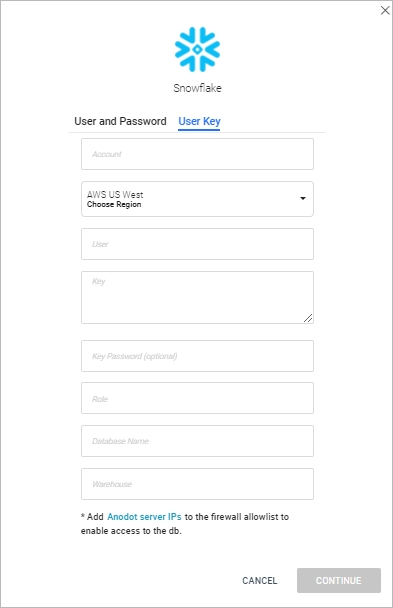
Note: The User Key credentials enable you to use an API to "update the key" without the need to create a new source. For more information, see Updating Source Credentials for Existing Sources .
-
- In the User and Password tab, define the following:
- Click CONTINUE.
- Make sure you add the Anodot server IPs to your firewall's allowlist. See Allowlist Anodot Servers .
To create a Snowflake stream query, see Creating a Stream Query from a Database .
Updated over 1 year ago
Did this page help you?