

Creating a Stream Query from a Database
This article describes how to create a stream query for database sources. For a current list of the supported database types, click here.
-
In the Sources page (accessed by clicking Integrations > Sources in the Navigation Panel), filter the list of streams to find the source for which you want to create a stream query.
Note: The streams associated with that source are displayed. If the streams panel is empty, no stream queries exist for that source. -
Hover over the relevant data source, and click + New Stream. The Stream Query page is displayed.
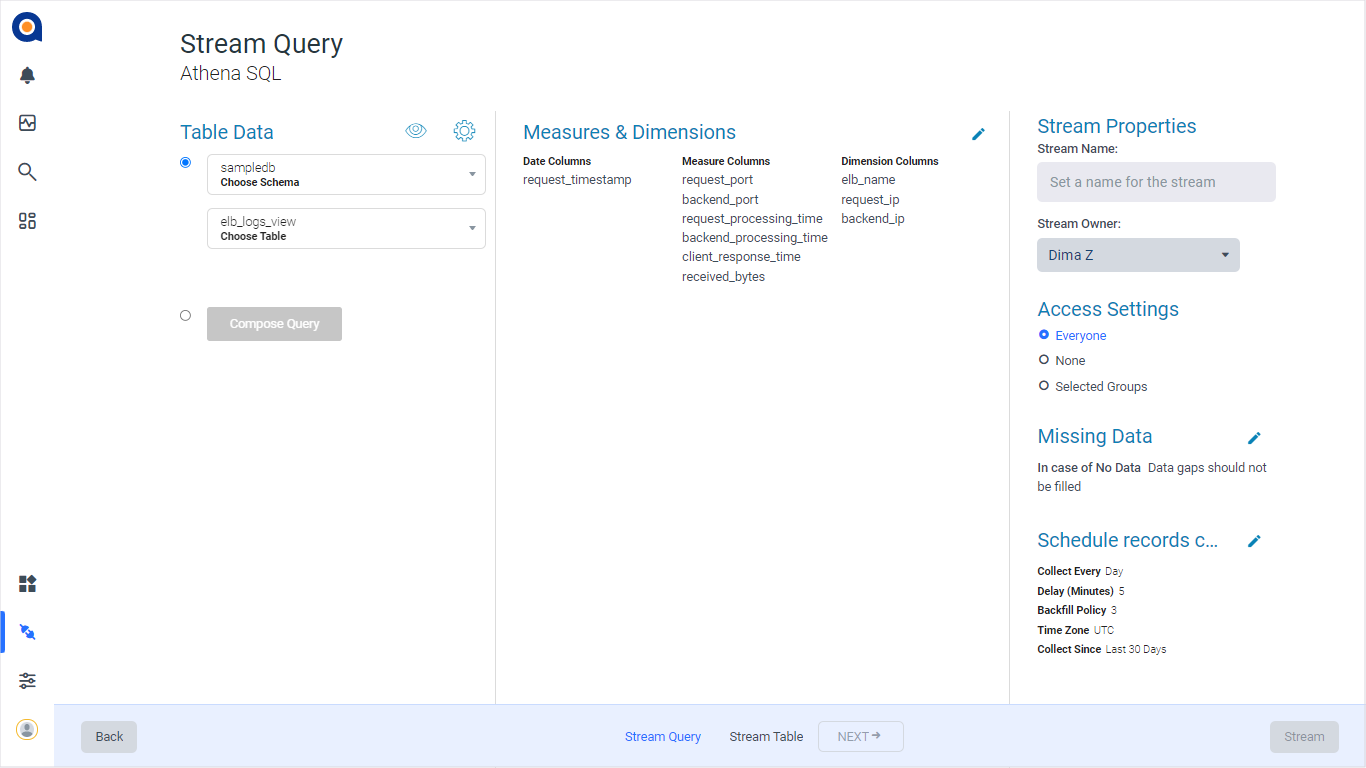
If there are no measures in the Stream Query, an editable Events Count column is automatically inserted in the Stream Table.
-
Define your Table Data from one of the following:
- Select Choose Schema and then Choose Table. To preview the data, click the Preview icon. By default Anodot imports your database schema as-is, replacing empty cells with ‘unknown’. To inject a different number of table columns, click the Settings icon. In the Import Settings dialog box, clear the Replace empty cells checkbox.
- Select Compose Query to open the Query Editor, as shown below; use the sample text and guidelines to build a query. Click Preview Results > Run to see the results of the query and click Actual Query > Run to see the actual query [for debugging].
Note: The following modifiers are supported for the from_time and to_time variables:
- EPOCH_SECONDS
- EPOCH_MILLISECONDS
- EPOCH_MICROSECONDS
- yyyy - Year
- MM - month
- dd - day
- HH - Hours
- mm - minutes
- SS - Seconds
-
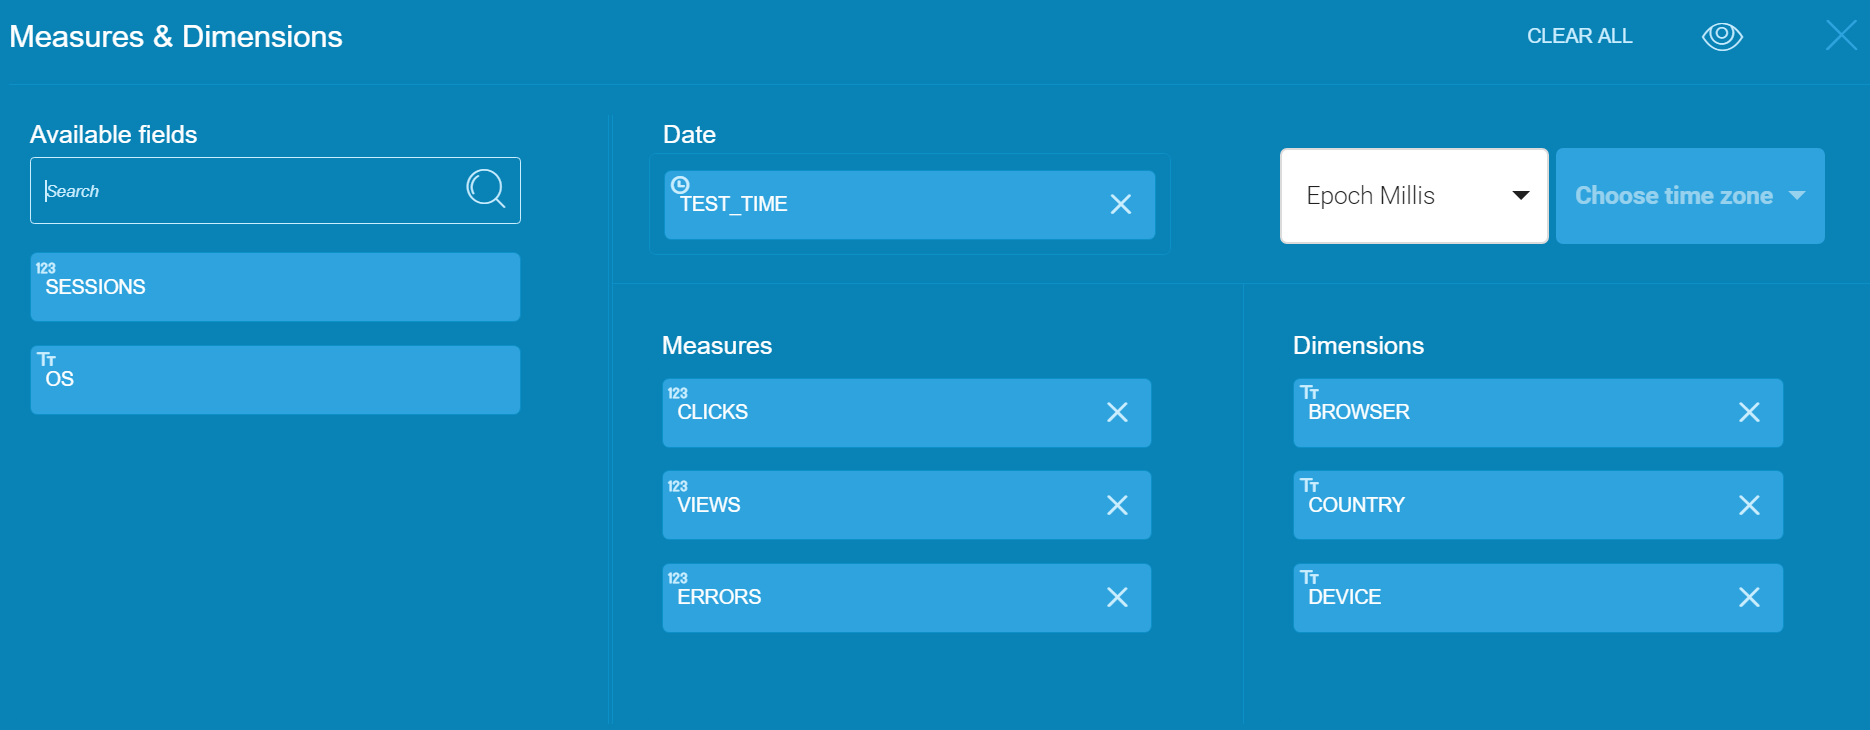
To edit the query data, click the pen icon in the Measures & Dimensions panel.
-
To add either a measure or a dimension drag the item from the Available fields column to the relevant column. If the item is not displayed, use the search box to locate it.
-
To add a date in the Date column, drag or search for a relevant field from the Available fields column.
-
Anodot supports the following datatypes as timestamps:
- DATE
- TIMESTAMP [Epoch Seconds/ Epoch Millis / Epoch Micro]
- INTEGER (not supported in BQ collectors)
- BIGINT (not supported in BQ collectors)
-
Choose a time zone; set this to match the Date column timezone.
-
Click X to apply the measures and dimensions settings.
-
In the Stream Properties section, add a name and owner for the stream.
-
In the Access Settings section, select from one of Everyone, None, or Selected Groups. These settings define who can access the data in the stream (in line with your RBAC settings ).
-
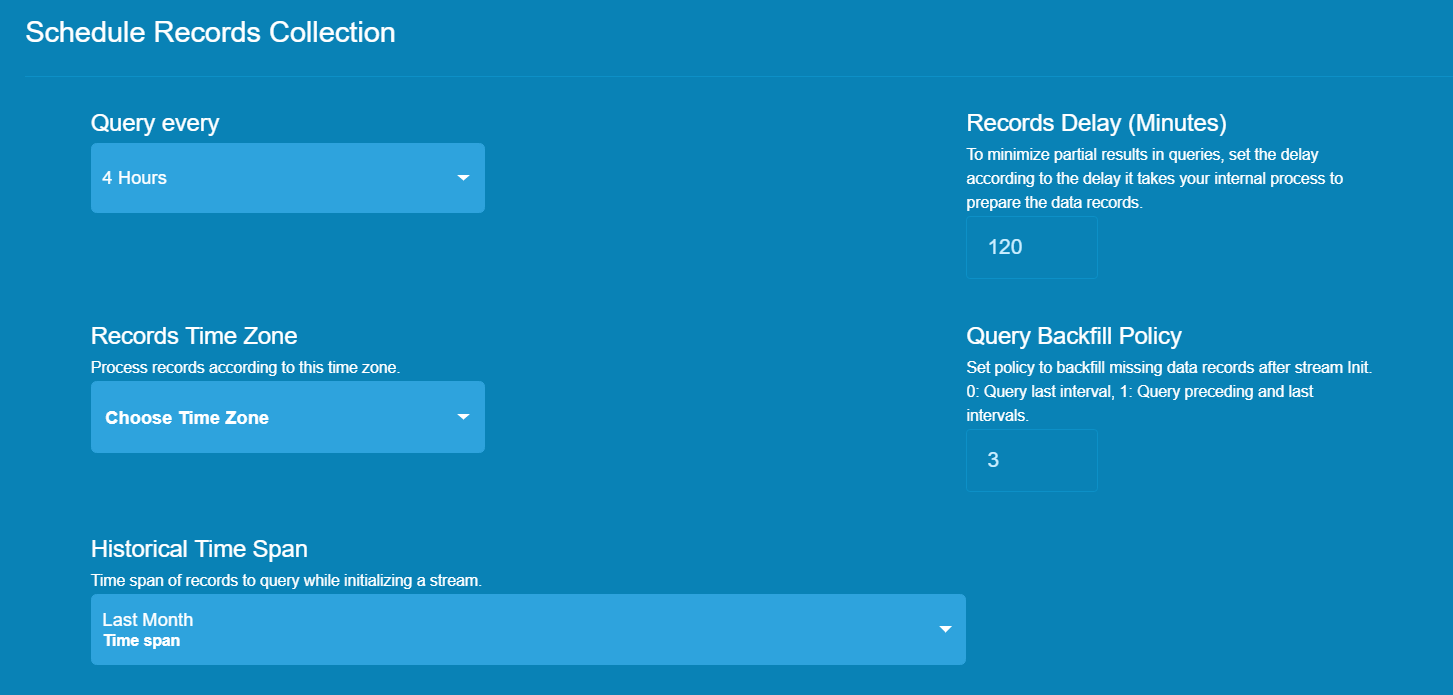
To edit the Schedule Records Collection, click the pen icon.
-
In the Query every field, set the intraday or daily collection interval.
-
In the Records Time Zone field, choose a time zone according to which the records will be processed. The default is UTC.
-
In the Historical Time Span field, choose a time span of records to query while initializing the stream.
-
In the Records Delay (Minutes) field, set the delay. The default is "0".
Note: To minimize partial query results, set the delay according to the delay your internal process takes to prepare the data records. -
In the Query Backfill Policy field, set the backfill missing data records policy after stream initialization. The default is 3.
Examples
0 = Query only last day/hour
1 = Query previous and last day/hour
50 = Query previous 50 last days/hours -
Click X to apply the scheduling settings.
-
Click NEXT. The Stream Table is displayed.
Updated over 1 year ago