

Amazon Redshift
This article describes the main steps required to create the Amazon Redshift data collector.
Creating an Amazon Redshift data source
-
In the Navigation Panel, go to Integrations > Catalog.
-
Use the Search box OR click the Databases filter to locate the data source.
-
Hover over the Amazon Redshift tile, and click Start. The Amazon Redshift dialog is displayed, as shown below.
Note: If the data source has already been used, a dialog is displayed in which you can select from one of the listed sources. Alternatively, create a new source by clicking Add a new source.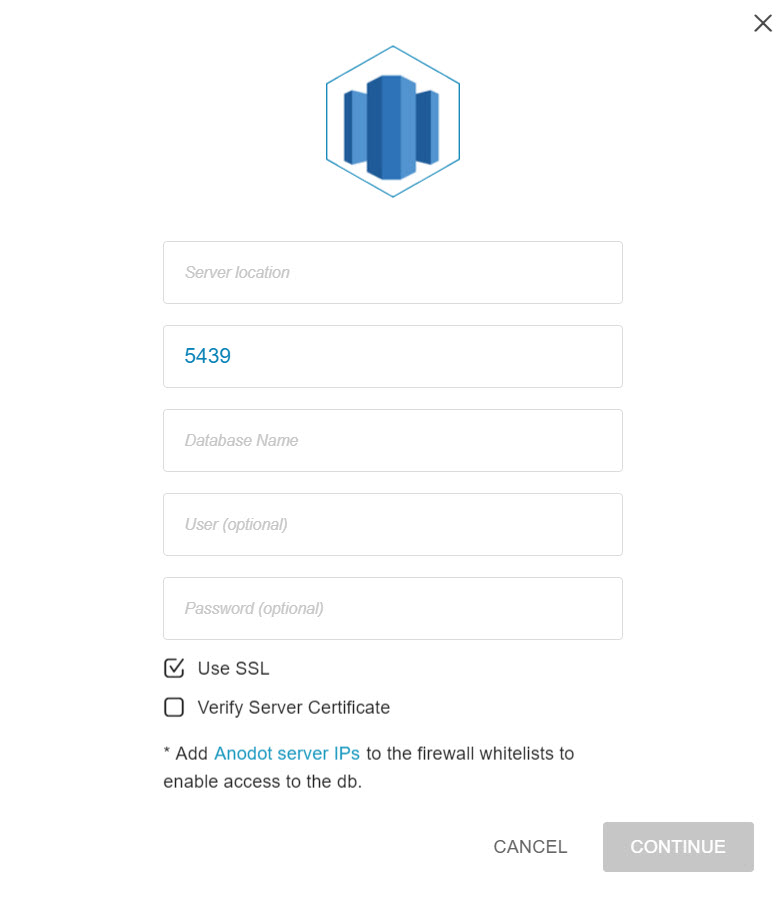
-
Enter your Server location.
-
Either enter your Amazon Redshift port number or leave the default port number [5439] as-is.
-
Enter a Database name.
-
[Optional] Enter a user name.
-
[Optional] enter a user password.
-
Enable / disable Use SSL. The default is Use SSL enabled.
-
Enable Verify Server Certificate.
-
Add an Anodot server IP to your firewall's allowlist.
See Allowlist Anodot Servers . -
Click CONTINUE to open the Stream Query window.
To create a Redshift stream query, see Creating a Stream Query from a Database .
Updated over 1 year ago