

Amazon S3 Parquet
This article describes the three main steps required to create an Amazon S3 Parquet Collector:
- Providing read access for Anodot using a bucket policy (see below for more information)
- Creating an Amazon S3 Parquet Data Source
- Creating an Amazon S3 Parquet Stream Query
Creating an Amazon S3 Parquet Data Source
-
In the Navigation Panel, go to Integrations > Catalog.
-
Use the Search box OR click the Storage filter to locate the data source.
-
Hover over the Amazon S3 Parquet tile, and click Start.
Note: If the data source has already been used, a dialog is displayed in which you can select from one of the listed sources. Alternatively, create a new source by clicking Add a new source. -
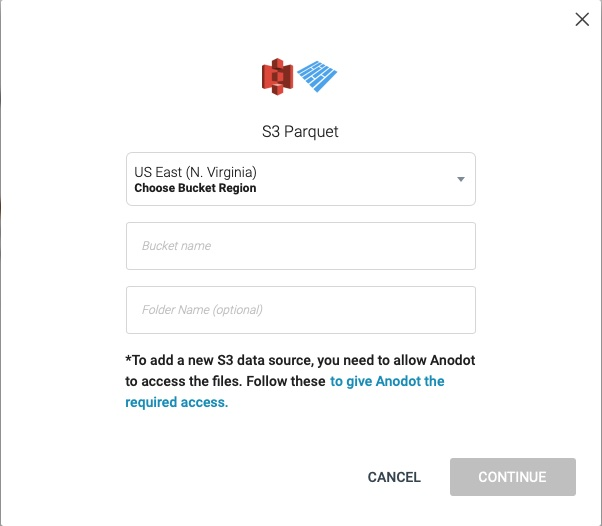
In the displayed dialog, select a bucket region, enter the bucket name, and enter a folder name (optional).
-
Setup the AWS bucket policy (see below) to enable anodot.com to access your S3 bucket.
-
Click CONTINUE to display the Stream Query window, as shown in the following section.
Creating an Amazon S3 Parquet Stream Query
-
In the Sources page (accessed by clicking Integrations > Sources in the Navigation Panel), filter the list of streams to find the Amazon S3 Parquet source for which you want to create a stream query.
Note: The streams associated with that source are displayed. If the Streams panel is empty, no stream queries exist for that source. -
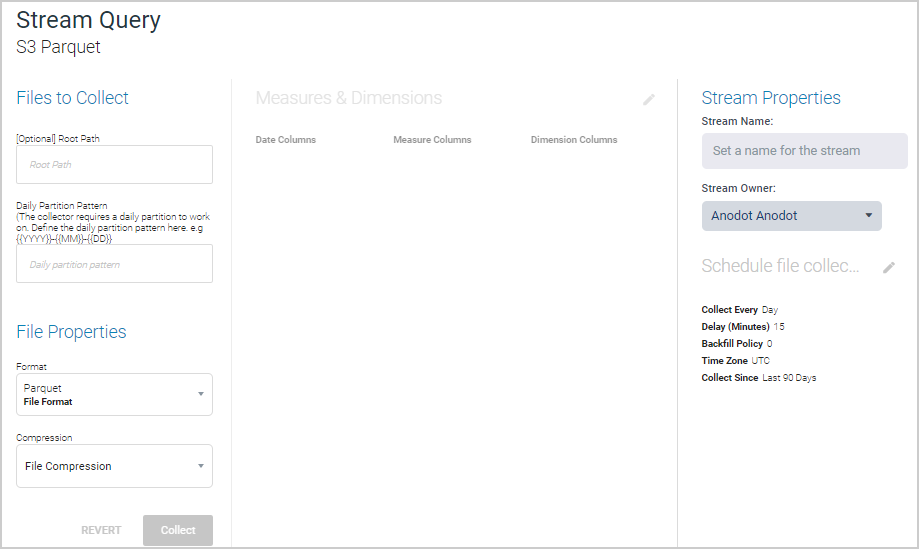
Hover over the Amazon S3 Parquet data source, and click + New Stream. The Stream Query page is displayed.
-
In the Stream Properties section, set a name and owner for the stream.
-
In the Files to Collect section, define an (Optional) Root Path (such as example-month-il) and the Daily Partition Pattern (such as {{DD}}-{{MM}}-{{YYYY}}).
-
In the File Properties section, define a Format (by default, Parquet is selected), and Compression (choose from None or Snappy).
Note: Non-Parquet files cannot be uploaded to the Parquet files directory. -
Click the Measures & Dimensions edit icon to define measures for the stream.
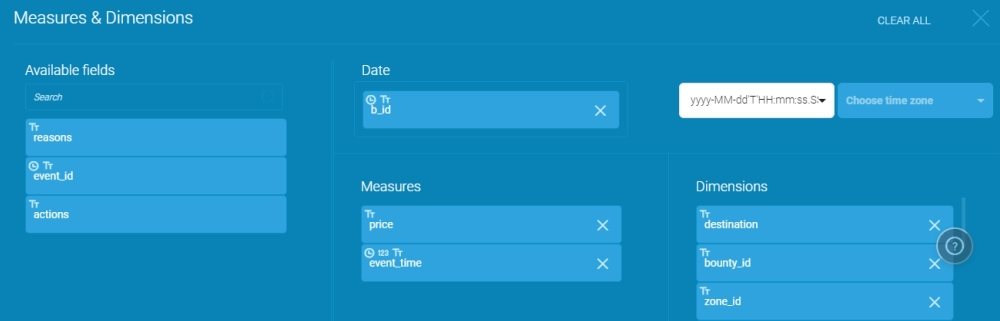
- To add an item, drag from the Available fields repository on the left to the relevant Measures or Dimensions panel. At least one dimension and one measure [a numerical value] are required.
- Select a time format from the dropdown menu, and then select a time zone.
- When finished, click X to accept the edits and return to the Stream Query window.
-
Click the Schedule File Collection edit icon to define file collection settings for the stream.
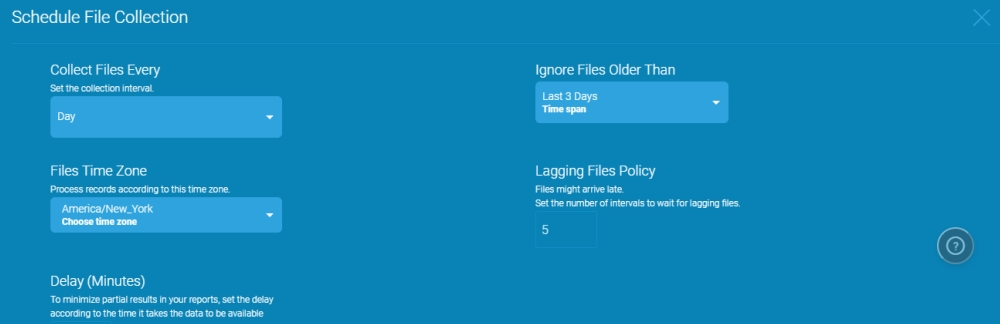
Define the following:
- Set the collection interval in the Collect Files Every field.
- Set the scheduling time zone of the data records time zone in the Files Time Zone field.
- Set the delay according to the time it takes the data to be available in the Delay (Minutes) field.
- Set a time span in the Ignore Files Older Than field.
- Set the number of intervals to waits for lagging files in the Lagging Files Policy field.
For further details on the above fields and their settings, see Editing a Stream Query.
-
Click X to confirm the scheduling settings.
-
Click NEXT. The Stream Table is displayed, as described in Stream Tables .
Create the bucket policy to allow Anodot read-access to the bucket
Add the policy below as the bucket policy
Change the bucket name to your bucket name.
{
  "Id": "Policy1520872584746",
  "Version": "2012-10-17",
  "Statement": [
    {
    "Sid": "Stmt1520872574434",
    "Action": [
      "s3:Get*",
      "s3:List*"
      ],
    "Effect": "Allow",
    "Resource": [
      "arn:aws:s3:::<bucket-name>",
      "arn:aws:s3:::<bucket-name>/*"
      ],

    "Principal": {
      "AWS": [
        "arn:aws:iam::340481513670:user/anodot-bc"
        ]
    	}
    }
    ]
}
Updated over 1 year ago