

Mixpanel
The Mixpanel Collector enables you to monitor information related to user interactions in a product. For example, the collector enables you to collect Mixpanel metrics on events (the interactions), users (the individuals performing the events), and properties (attributes of both events and users).
Creating a Mixpanel data source
-
In the Navigation Panel, go to Integrations > Catalog.
-
Use the Search box OR click the Monitoring filter to locate the data source.
-
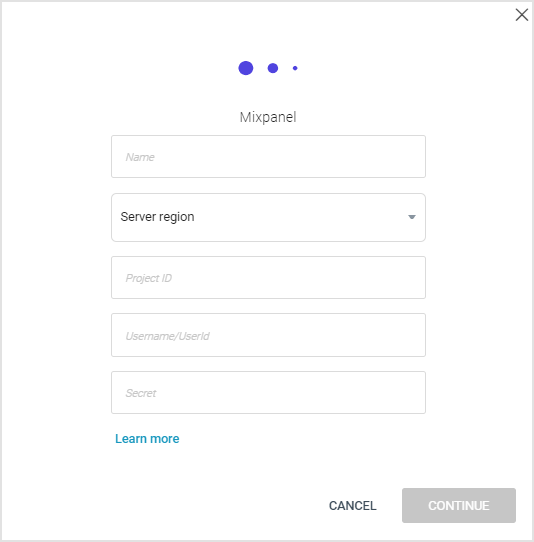
Hover over the Mixpanel tile, and click Start. The Mixpanel dialog is displayed, as shown below. Note: If the data source has already been used, a dialog is displayed in which you can select from one of the listed sources. Alternatively, create a new source by clicking Add a new source.
-
Define the following:
- Name: The name for the data source.
- Server region: The Mixpanel URL to use for API calls. Currently there are two options available – the Standard server (mixpanel.com/api) and the EU Residency server (eu.mixpanel.com/api).
- Project ID: A unique Mixpanel alphanumerical token for collecting data. For more information, click here.
- Username/UserID: The username/ID of the Mixpanel service account, which is a special type of account intended to represent a non-human entity such as a script or back-end service. For more information, click here.
- Secret: A Mixpanel project's secret can be found in the Access Keys section of a project's settings overview page, as described here.
-
Click CONTINUE.
Creating a Mixpanel stream query
If you have just created a Mixpanel data source, skip to step 3.
-
In the Sources page (accessed by clicking Integrations > Sources in the Navigation Panel), filter the list of streams to find the Mixpanel source for which you want to create a stream query.
Note: The streams associated with that source are displayed. If the streams panel is empty, no stream queries exist for that source. -
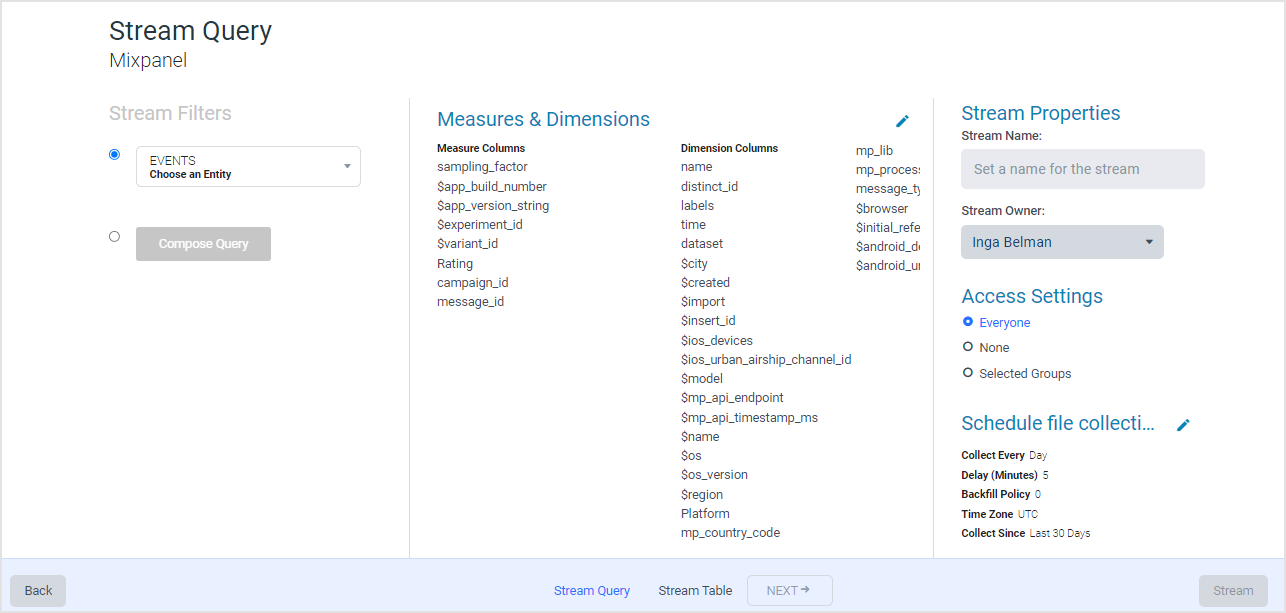
Hover over the Mixpanel data source, and click + New Stream. The Stream Query page is displayed.
-
Define your stream query settings in the following sections:
- Stream Filters: Choose the relevant entity from the Choose an Entity dropdown list OR select the Compose Query option to define a query.
- Measures & Dimensions: After selecting an entity (see the previous bullet), the available measures and dimensions are displayed; this list can be modified as required by clicking the pencil icon.
- Stream Properties: Define a name and owner for the stream.
- Access Settings: Define if Everyone, None, or Selected Groups will have access to this stream and its data.
- Schedule file collection: Click the pencil icon to define the various scheduling settings, including the Collect Since value (the time span of data to query while initializing a stream).
-
Review the Stream Query page to confirm your chosen stream data.
-
Click NEXT. The Stream Table is displayed; see Stream Tables for more information.
Updated over 1 year ago