

Alert Management
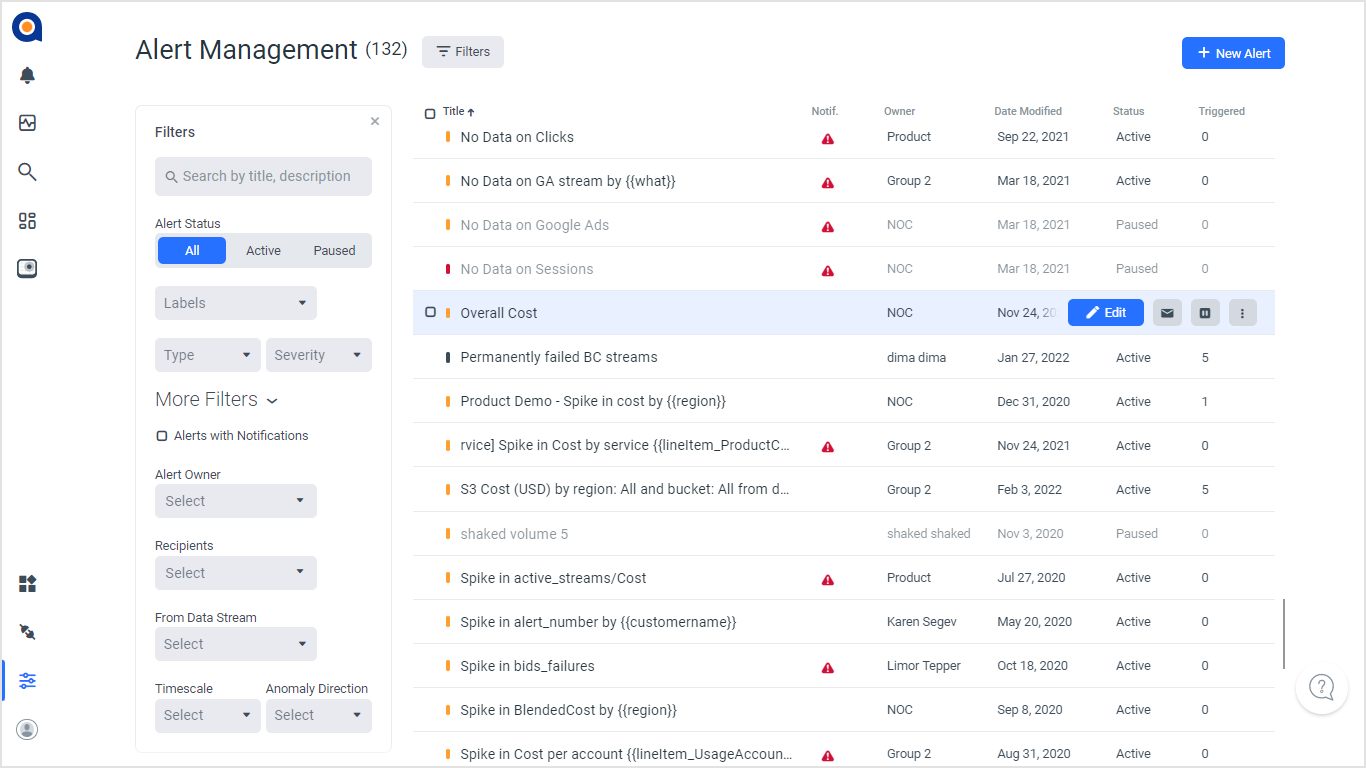
The Alert Management page displays a number of important details about your alerts, including notifications of errors, ownership, and the current status of an alert. In addition, there are a number of actions you can perform on the listed alerts, including the following:
- View additional information.
- Filter alerts. If the Filter panel is not displayed, click the Filter button.
- Edit, subscribe, pause, duplicate, delete alerts.
- Create new alerts. See Creating New Alerts.
- Bulk edit one or more alerts to add and remove recipients, pause alerts, labels and resume alerts.
- Assign owners (users or groups) to one or more alerts.
- Assign an alert to a group.
- Use labels to organize alerts.
- Setting channels as the alert recipient.
- Create dashboard tiles from alerts.
Notes
- To change the sort order of any of the alert parameter columns [Title/Notification/Owner/Date
- Modified/Status/Triggered], click the relevant column header.
- To view the severity of an alert, hover over the color-code bar next to the alert title.
- To view the notification details, hover over the warning icon:
- A Red triangle indicates that the search result is empty - either there is no data or it is invalid.
- An Orange triangle indicates that the composite delay has been changed.
View Additional Alert Information
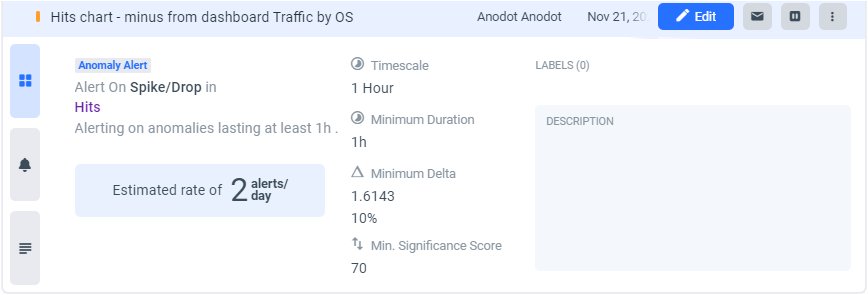
To display more information about a specific alert, click the alert row. Then choose the information you want to see by clicking the relevant tabs (located on the left of the displayed popup):
- Summary for a high-level summary of the alert.
- Alert Console to view alerts listed in the Alerts Console. See Alert Console.
- Details for a full alert report.
Filtering Alerts
To show or hide the Filters panel, click the Filters button. Alerts can be filtered using any combination of the following parameters:
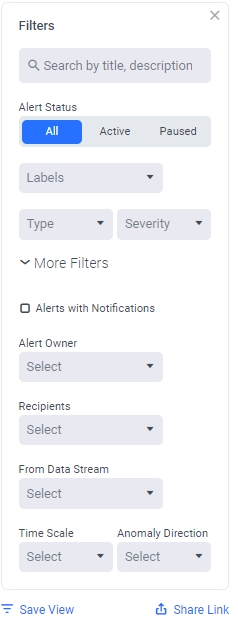
Auto search: start typing the title or description of the
alerts you want to filter.
Filter All, Active, or Paused alerts.
Add any labels to further refine your filtering.
Select Alert Type(s) (Anomaly, Static, or No Data)
and/or Severity (Critical, High, Medium, Low, Info).
Select to display alerts with notifications.
Select alert owner(s) (including groups).
Select recipient(s).
Enter any part of a data stream's description or title
to display matching options.
Select the Time Span in which metrics are aggregated
(1 minute / 5 minutes / 1 hour / 1 day / 1 week).
Select the Anomaly Direction (Up or Down, or Up and Down).
Select Save View to save your current filter settings,
or Reset to Default to clear all filters.
Click Share Link to copy the link to your clipboard.
To View the Filters Applied
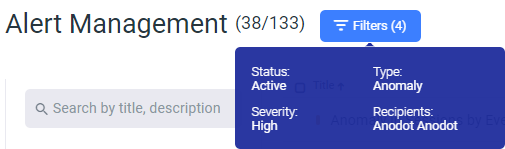
To display a summary of the filters selected, hover over the Filters button.
Notes
- (38/133) - Indicates the total number of alerts meeting the selected criteria.
- Filters (4) - Indicates the number of filters applied.
Editing Alerts
To edit an alert
- Hover over the alert to display the Edit toolbar.

- Click the relevant icon to:
- Edit an alert [Alert owners and Admin users only]. See Creating and Tuning Alerts.
- Subscribe/ Unsubscribe to alerts
- Pause /Resume Alerts. Alerts can be paused for
- An hour
- A day
- A week
- Indefinitely
- Define more options - click the More options icon to select from one of the following:
- View Activity Log - access the Activity Log.
- Duplicate - a copy of the alert is automatically created.
- Composite Delay - define how long Anodot waits before computing the next data point of the composite. See Managing delays in Composite Metrics.
- Create Dashboard Tile - create a dashboard tile from the alert .
- Delete alerts [Alert owners and Admin users only].
- Click Save to return to the Alert Management page.
Bulk Editing
To add recipients, pause/resume alerts and labels to more than one alert at a time, use bulk editing.
-
Choose the alerts you want to bulk edit.
Either select individual alerts - scroll and select the relevant alert checkbox.
Or to globally edit all the alerts - select the Title checkbox. All the alerts are automatically selected.The bulk edit bar is displayed:

-
Choose:
- Recipients to add recipients
- Pause to pause for a chosen interval
- Labels to search and add labels
- Delete to delete the selected alerts
- More to resume paused alerts or assign an owner (described in the following section)
Assigning Alert Owners
This option enables you to assign the owner of an alert. The owner can configure the alert settings, as required.
To assign your alerts to another owner (a user or group):
- Choose the alert(s) to which you want to assign a new owner. Note that you can select any number of alerts that you own.
- Click the More button on the Bulk Editing toolbar, and in the displayed popup menu, click Assign Owner.
- In the displayed list of users and groups, select an owner and click Apply.
Assigning Alerts to Groups
In addition to assigning an alert owner, as described above, you can also assign an alert to a group (for example, your support center). This will send the alert to all the group members; the group members are forwarded the alert on a round-robin basis. Note that the group members will receive notifications of the alert triggers; they will not be able to modify the alert itself.
To assign an alert to a group:
- In the Alert Management screen, hover over the required alert, and click Edit. Note that you cannot select multiple alerts for this feature.
- In the Alert Notifications section of the alert, click + Assignment Group.
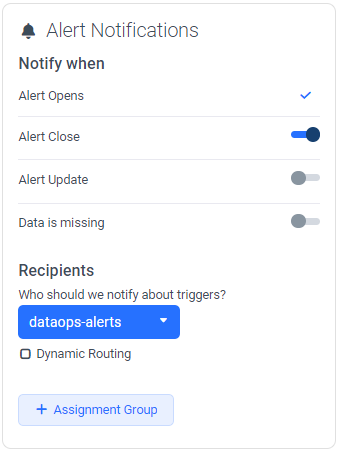
- In the displayed dropdown list, select the relevant group. The first group member will receive the notification that they have been assigned the alert; if they are unable to handle the alert, the alert is assigned to the next group member.
Organizing Alerts with Labels
You can use labels to organize your alerts according to your requirements. You can add labels when you create or edit an alert. You can then filter alerts both in the Alert Management page and in the Alert Console, based on the labels you applied.
Setting the Channel as the Recipient in an Alert
- In the Alert Management screen, hover over the required alert, and click Edit. Note that you can also set the channel when defining a new alert, see Creating New Alerts. For more information about managing your alert channels, see Alert Channels Overview.
Note that you can also select multiple alerts, as described in Linking the Channel to Multiple Alerts .

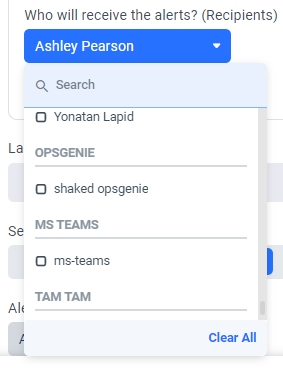
- In the Info & Recipients section of the alert, click the Select box to define who will receive the alerts. In the displayed popup, as shown below, choose the specific channel instance which maps to the relevant channel service (for example, MS Teams). Repeat the process to add multiple services.
Linking the Channel to Multiple Alerts
- Hover over the required alerts, and select the checkbox to the left of each alert, as indicated below.
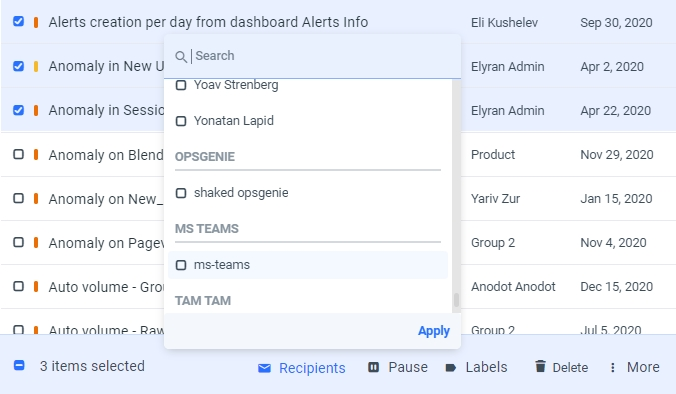
- In the bulk operations toolbar at the bottom of the screen, click Recipients.
- Select the channel you want to link to and click Apply.
Create a Dashboard Tile from an Alert
- In the Alert Management screen, hover over the required alert, and click the More icon.
- In the displayed menu, click Create Dashboard Tile. The following dialog is displayed:
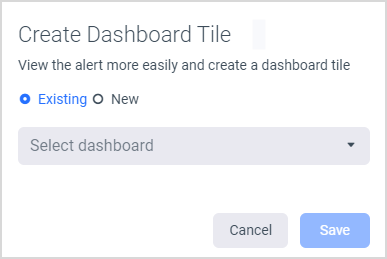
- Select one of the following:
- Existing: Enables you to add the tile to an existing dashboard; select the relevant dashboard from the dropdown list.
- New: Enter the name for the new dashboard.
- Click Save.
In the displayed popup message, you can click the Go to Dashboard link to access the dashboard.
Updated over 1 year ago