

Create a New Dashboard
This article describes how to create a Dashboard, a central repository for groups of metrics.
To create a new Dashboard
- In the Dashboards window, click + New Dashboard.
- In the displayed dialog, click Create a New Dashboard.
If you want to work with the classic Dashboards, click the Create a classic dashboard instead link.
The Create a new dashboard dialog is displayed.
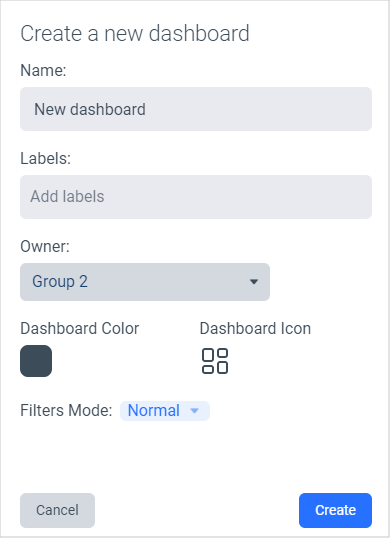
- Define the following:
- Name: Enter a name for the new Dashboard.
- Labels: Start typing a label; select the checkbox for the relevant label(s). Alternatively, create a new label. Note that you can add any number of labels to the Dashboard.
- Owner: Select an owner from the displayed list of users and groups.
- Dashboard Color: Click to select the relevant color.
- Dashboard Icon: Click to select the relevant icon.
- Filters Mode: Select from one of the following:
- Normal: The default filter mode; when selecting a selector, the Dashboard tiles are immediately updated with the selected values.
- Apply: Adds an Apply option to the displayed selector lists. The Dashboard tiles are only updated with the selected values when clicking Apply. This can be especially useful for resource-intensive Dashboards.
- Click Create. The new Dashboard is opened; edit and customize the Dashboard according to your requirements.
Updated over 1 year ago
Did this page help you?